


Do your kids have a fascination with jellyfish? My kindergartener is obsessed with them, especially the bright, colorful ones that have long tentacles. She loves catching the clear baby jellyfish at the beginning of the season that have no tentacles (or “moonies,” as we call them). And, come late July into August, she is constantly on the hunt with a net and bucket to catch the big, stinging jellyfish. Once she catches one and puts it in a bucket (with a little help!), she can literally watch it for hours. We’re constantly reminding her to be careful touching the top of the jellyfish! So, naturally as we make our way toward the end of winter, I had to find a craft that reminded us that summer is coming! Here’s how to make your own jellyfish with this easy and adorable paper plate craft.
What you need:
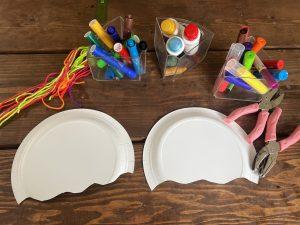
- Paper plates
- Scissors
- Paint, markers, crayons, or colored pencils
- Hole punch
- String or yarn
Jellyfish assembly:
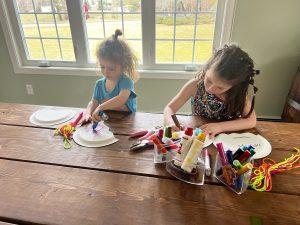
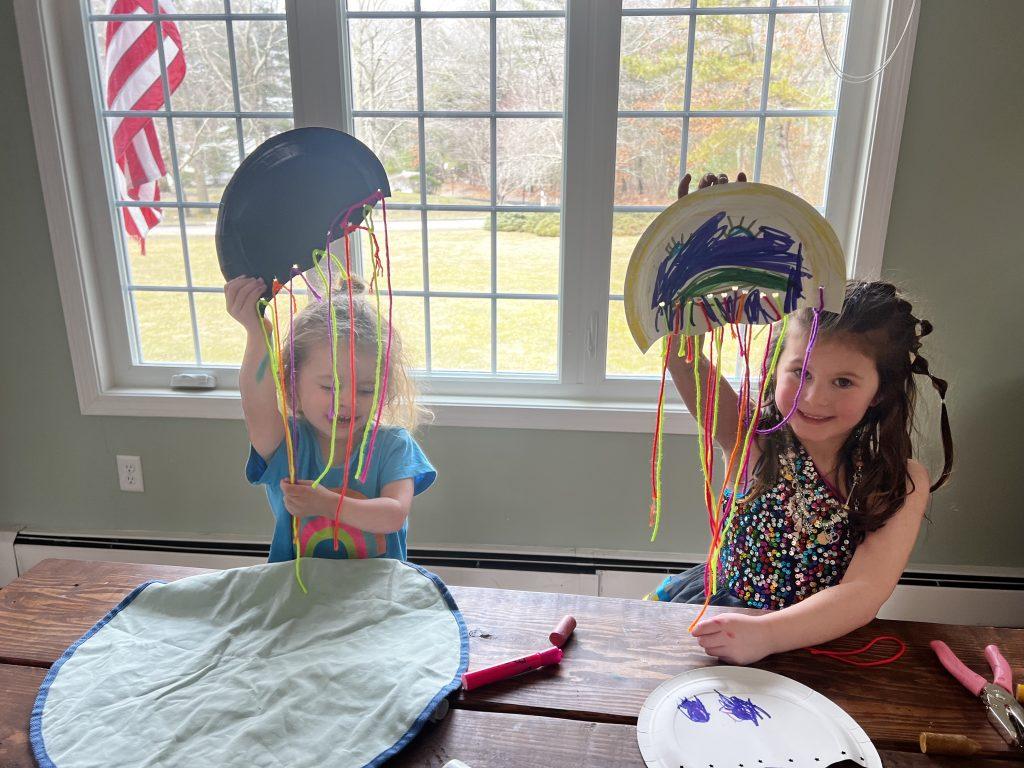
Paper plate jellyfish are a fun craft for a wide range of ages, and the best part is they are EASY! My 2-year-old and 5-year-old were both excited to take part and could help with each step.
First, I recommend doing a bit of adult prep before sitting down with the kids. This prep includes cutting off the edge of the plate in a wavy pattern to make sure the outline looks a bit more like a jellyfish. I prepped two plates each for my two girls. Next, I would recommend pre-cutting your yarn or string so that it is ready to go when the time comes to tie on the tentacles. I used different color yarn because I know my kids like to alternate colors and designs.
Now comes the fun! My girls decided to use crayons and markers to decorate their jellyfish. When adding extra creativity to your jellyfish, you can do as much or as little as you want. You can add some fun flairs like glitter or gemstones. You could even add some googly eyes for extra fun.
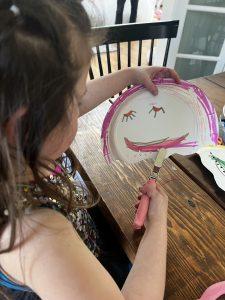
Once their jellyfish creation is complete, you are going to want to punch holes in the bottom of the plate along the wavy line to tie on the tentacles. Depending on the age of your kid(s) you might have to help out with the hole punching. My kindergartener is obsessed with hole punching and wanted this to be her job, but my 2-year-old is not quite ready to do this step on her own.
Next, you will want to tie the strings onto the plate, making the knots in the back so that they are not visible. Again, this could be a parent or a kid task depending on your child’s tying abilities. Once the tentacles are on your jellyfish, voila, it is complete! Feel free to make as many as you want.
The Finished Product:
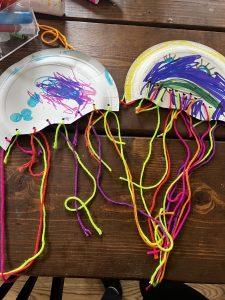
My girls were both so proud of their jellyfish and couldn’t wait to show them off to friends and family. This is definitely a project we will be repeating again and I look forward to incorporating it into the next playdate we host.
Feel free to share your jellyfish by tagging me @snfenlon and @capecodmoms on Instagram.


