10 Fun and Meaningful Ways to Celebrate Earth Day with Kids

Kids celebrating after a clean-up along a Cape Cod trail

As a mom, I strive to instill love and respect for the environment in my children. For us, this looks like spending a lot of time outside exploring and enjoying Cape Cod’s beautiful and unique landscape. Weaving these experiences into our days together goes hand-in-hand with teaching my kids valuable lessons to help them grow into good citizens. 

Earth Day, celebrated annually on April 22nd, provides a perfect opportunity to engage with your kids in fun and educational activities centered around helping them understand the importance of nurturing and caring for the earth. Here are ten fun and meaningful ways to celebrate Earth Day with kids:

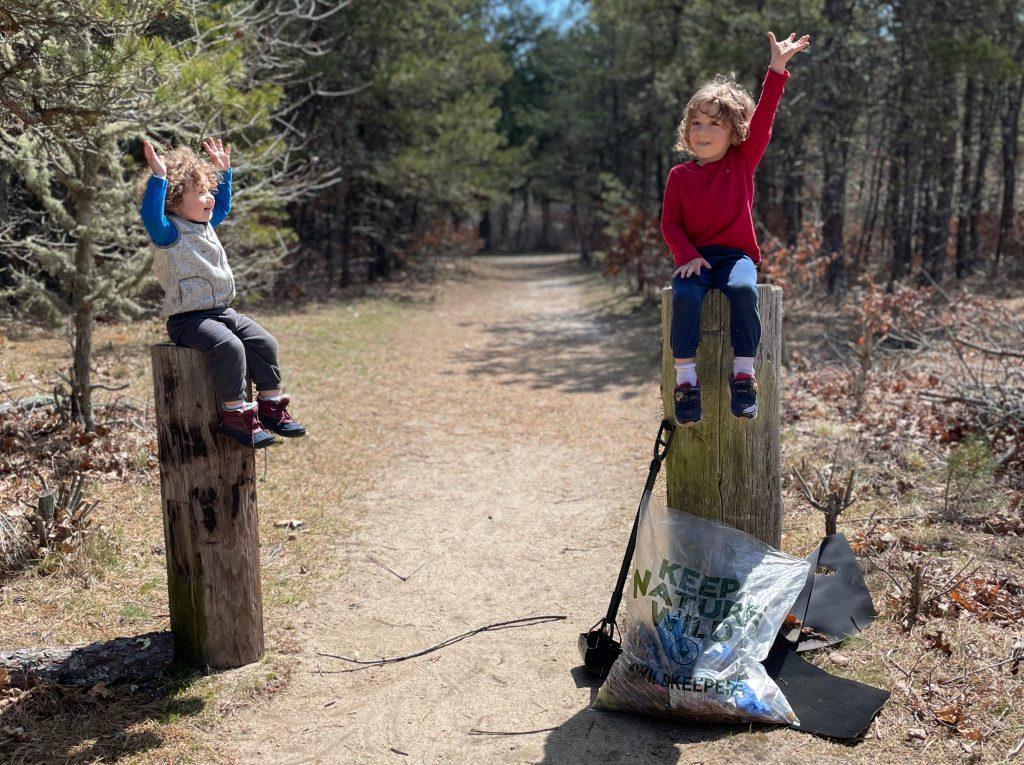
1. Clean up your neighborhood 

Grab your gloves and trash bags and spend some time picking up litter at a local park, along nearby trails, or at your favorite beach. Now we are to the point that my kids’ eagle eyes spy trash a mile away, so I always carry trash bags and gloves in my hiking backpack. Bonus points: Show your kids the importance of taking care of their community by organizing a neighborhood clean-up event.

2. Go on a nature scavenger hunt

First, create a list of items for the kids to find, such as leaves, rocks, flowers, and animal tracks. Encourage your kids to use their senses to observe and appreciate nature’s beauty. This activity promotes outdoor play and teaches children to be mindful of their surroundings.

3. Grow something

Get your hands dirty and plant something together. This can be as simple as starting seeds in paper cups, creating a mini herb garden indoors, planting a vegetable garden, or planting pollinator-friendly perennials around your yard. Many options can be scaled to fit your level of interest, experience, and budget. 

4. Start composting

Start a compost bin with your kids to turn kitchen scraps into nutrient-rich soil for your garden. Get started by teaching them what items can be composted, such as fruit and vegetable peels, eggshells, and coffee grounds. Next, show them how composting helps reduce waste and enriches the soil. Not only will this activity help reduce your household’s environmental impact, but it will also provide valuable lessons in biology and ecology for your children.

5. Feed the birds

The Cape is home to many different species of birds. Invite them into your yard for a snack with a DIY bird feeder. There are lots of ways to do this, including making one from recycled materials like paper towel rolls, egg cartons, or pine cones. 
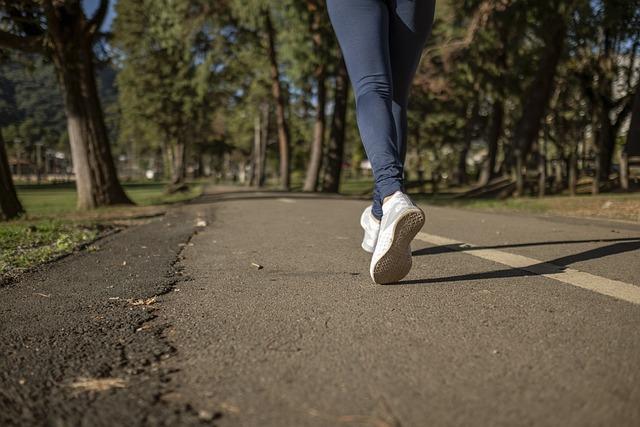
6. Go on a hike

Lace up your sneakers and hit the trails with your kids for an adventure in nature. Cape Cod offers many excellent kid-friendly hiking options. We recently went on a fun story walk hosted by the Chatham Conservation Foundation. While on your hike, encourage your children to observe the plants and animals they encounter. This provides a great opportunity to discuss the importance of preserving natural habitats. Combine your hike with a nature scavenger hunt for added fun.

7. Visit a local farm or farmers market

Visit a farm or farmers market to help your kids understand that food doesn’t magically appear at the grocery store. Taylor-Bray Farm in Yarmouth Port is a personal favorite for our family. This kid-friendly historic property is beautiful and educational. My kids know the chickens by name, and a visit always seems to promote discussions about where eggs really come from. 

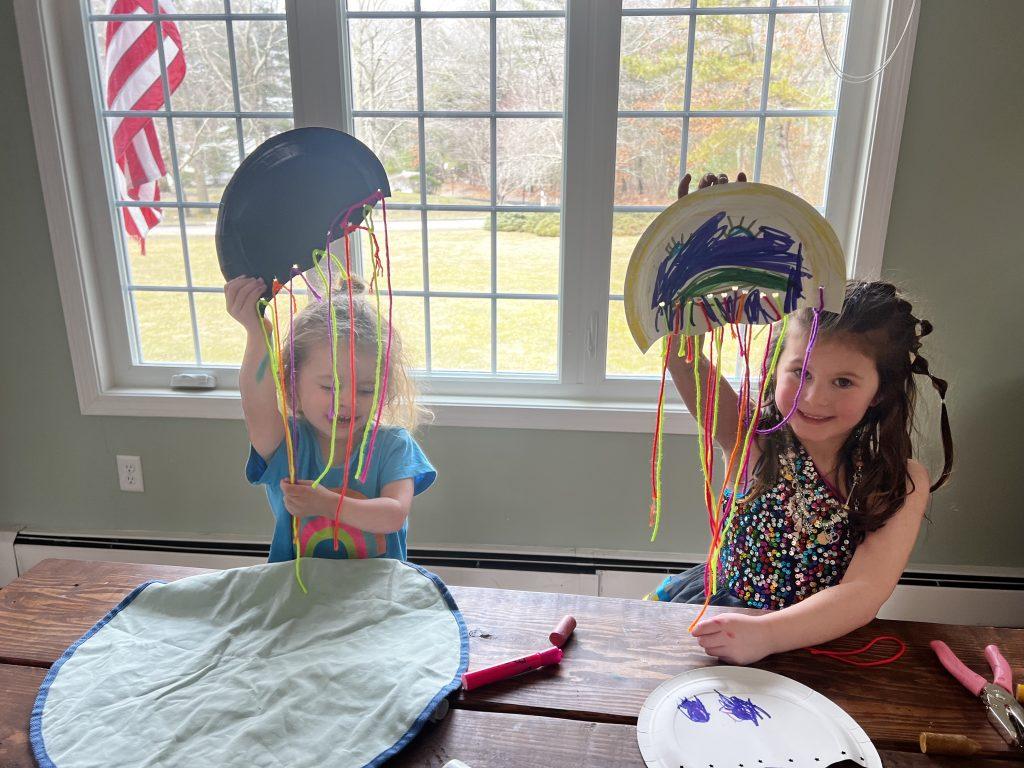
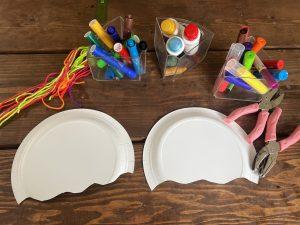
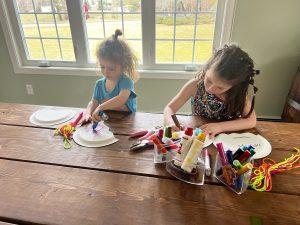
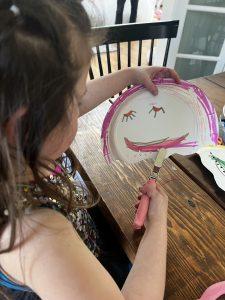
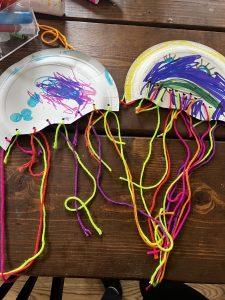
8. Create recycled art

Get creative and repurpose household items into works of art with your kids. Start by raiding your recycling bin or collecting recyclable materials such as cardboard, paper tubes, and plastic bottles. Be sure to let your and your kids’ imaginations run wild! From making sculptures to creating collages, eco-friendly art offers endless possibilities to inspire your children to stretch their creative muscles while learning about the importance of recycling and reducing waste.

9. Host a clothing swap

Textiles comprise a large part of landfill waste. Studies show that it can take over 200 years for clothing and textiles to decompose. Empower your kids to help reduce textile waste by hosting a clothing swap with friends and neighbors. Encourage everyone to bring gently used clothing, shoes, and accessories they no longer wear, and let everyone trade items. Your clothing swap will help reduce the demand for new clothing production and promote a sense of community and sharing among your children.

10. Watch a nature documentary together

Wrap up your Earth Day celebrations by watching a nature documentary together as a family. Choose one that highlights the beauty and diversity of the natural world. This can make a great jumping-off point for discussing protecting endangered species and preserving fragile ecosystems with your children. We’re big fans of all the great options from National Geographic available on Disney+.

By incorporating these fun and meaningful activities into your Earth Day celebrations, you’ll create lasting memories with your children and instill in them a lifelong passion for environmental conservation. Together, you can positively impact the planet and inspire the next generation to take care of the earth. Happy Earth Day!

It’s a Family Trip, Not a Vacation (and How to Prepare)

Kids swimming in a poolDo you ever come home from “vacation” exhausted? In February, we took our family to Orlando. We stayed at a kid-friendly resort and took our oldest to Magic Kingdom for a day. For the most part, we had near-perfect weather (high 60s, low 70s with sunny days) and a convenient location. We were able to walk almost everywhere we needed to go, and we had family traveling with us who could help with the kids so that we could get an occasional break. But I learned that family trips are not the same thing as a vacation, and that it’s important to prepare accordingly.

Now that we’re back, I can safely say that conquering my first week-long vacation with our young family is something I’m happy to have experienced, but also happy to have behind me. There are no regrets on my part and I’m so glad we went (the kids had a blast!). However, I now know several things I would do differently next time, and you might also be able to learn from them for your future family trips.

Now that I’ve had the experience, next time, we’ll aim to prepare for our family trip by:

Going for a shorter amount of time

Being away for eight days was far too long for me. I think four to five days might be a sweet spot. Since having our twins, we’ve gone away for three days a couple of times. So eight days was a giant leap for us. Four to five days feels like just the right amount of time, not too short and not too long.

Planning something to do every day—for everyone

As I mentioned, we had one day planned for Disney. We’d planned to spend the rest of the time at different pools at the resort with my husband’s family. It ended up being a little harder with my twins since we didn’t want to keep them out in the sun for too long, so we ended up splitting up a lot. My husband and I joke that I have a hard time sitting still and relaxing, which is 100% true. I think planning something to do other than the pools would have helped everyone.

Approaching meals and snacks differently

We were lucky that our hotel room had a full kitchen, but my husband and I also felt like we didn’t get a break from making food and cleaning up after our three little ones. Next time, I would meal plan and meal-prep when we first get there (I did a little before we left, but not enough for the week), and then plan specific days to get takeout. My husband and I have also discussed looking for hotel options that includes some or all meals, as well as more activities geared towards little kids.

Looking back, the time we got to spend together as a family was invaluable. Watching our three kids smile and play is such a gift that we get to experience. Now that we’re planning to do things a little differently next time, I’m already looking forward to planning our next family trip.

In search of more travel tips? Check out Flying with Two Toddlers: A Success Story. You can also read Traveling With Toddlers :: Can We Talk About the Good Stuff Too? for another take!

Where to See Herring Runs on Cape Cod

Stony Brook Herring Run on Cape Cod photo by Lissy Perna, herring runs on cape cod
Stony Brook Herring Run on Cape Cod

Herring runs are filling to the gills with fish, which means it’s o-FISH-ally springtime on Cape Cod! Every spring, a miraculous and historical migration takes place. Thousands of herring swim from the ocean waters surrounding Cape Cod through tidal creeks to freshwater ponds to spawn. Like clockwork, the silvery bodies of these herring jump and fight up the fish ladders in early May. This migration takes a few weeks, and it is a magical sight to see. After laying their eggs, the herring return to the ocean, weary from their long journey. These fish make this yearly journey up to eight times in their lifetime. Read on to find my top recommendations for locations to visit to see the herring runs on Cape Cod!

Stony Brook Herring Run & Gristmill, Brewster

This specific herring run is near and dear to my heart, as I spent many childhood days there. My father is also the Miller and Herring Warden at Stony Brook. Make sure to come back on Saturdays throughout the summer to see the gristmill in action grinding corn, and visit the museum, too!
Address: 830 Stony Brook Road, Brewster

Pilgrim Lake, Orleans

The herring run here is lovely to visit with small children, as the sandy bottom of the stream gives you a great view of the fish. Walk along the stream and watch the fish climb the ladder to Pilgrim Lake. Pro tip: wear boots, as it can get muddy along the stream.
Address: end of Herring Brook Road, Orleans

Herring Run Recreation Area, Bourne

This location is a great spot to view the herring migration on Cape Cod. Miles of trails along the canal, including an interpretive loop trail explaining the history of the Cape Cod Canal, are nearby.
Address: 810 Scenic Highway, Bourne

Herring River, Harwich

This location is a great spot to look for herring, and there is a short and sweet loop trail adjacent to the run. Watch for osprey perched in the trees above the run, looking for their next meal.
Address: off Depot Street in West Harwich

More herring runs on Cape Cod to explore

There are many herring runs across Cape Cod. Here is a list of other locations where you might see some herring making their annual migration.

Herring River, Wellfleet
Herring Pond, Eastham
Lover’s Lake, Chatham
Scargo Lake, Dennis
Long Pond, Yarmouth
Tom Mathews Pond, Yarmouth
Mill Creek and Upper Shawme Pond, Sandwich
Cedar Lake and Coonamessett River, Falmouth
Santuit Pond Fish Ladder, Mashpee

When is the best time to see the herring runs on Cape Cod?

The herring appear in the highest volumes in late April and early May. I share updates on my Instagram page, Get Outside Cape Cod, so be sure to check that out, too. I hope you and your family can witness this natural phenomenon this year!

For more information about the herring runs on Cape Cod

To read more about this natural phenomenon on Cape Cod, along with how to become a volunteer fish counter, please visit the Association to Preserve Cape Cod website. For other fun things to do on the Cape during the spring, check out this post!

Staying Safe on the Run

A runner's legs running on pavement, staying safe on the run

Running is a cheap and accessible form of exercise, but in recent times many women struggle with feeling safe on the run. In February, 22-year-old nursing student Laken Hope Riley was murdered when she was out running on her college campus. In September 2022, mom Eliza Fletcher was killed while running early in the morning before her kids woke up. Stories like this are all too common, and women are more hesitant than ever to go out for their morning run. As the weather gets warmer and we find ourselves lacing up to get some fresh air, here are some tips for staying safe on the run.

Tell Someone

Before you step out the door, make sure someone knows where you’re going and when to expect you back. You can share your location on your phone so they can see your  whereabouts. If you use a running app like Strava, you have the ability to share your location in real time. Your partner will also be able to see your pace and battery life.

Have Protective Gear Ready

If you’re headed out the door in the early morning hours or later at night when it’s still dark out, make sure you can see and be seen. Wear a light-up vest and a head lamp (especially if you’re running on trails or uneven ground). I also splurged on open-ear headphones like these Shokz ones so that you can hear the environment around you. If you don’t have access to these, run with only one ear bud in or without music so you can stay aware. I also carry runner’s pepper gel and a personal alarm. This alarm is loud and all you have to do is pull on the bottom and anyone around you will be alerted. I recommend stopping by a running store like Marathon Sports in Yarmouth. They have a great selection of products to keep you safe on the run.

Consider Varying Your Routes

This one can be really hard. As moms and runners, we’re creatures of habit and love a routine. However, changing up where you run and at what time of day is a great way to make sure you don’t become an easy target. Sometimes it’s as easy as running your usual route in the opposite direction or on the other side of the road. When you can, stay on main roads and in well-lit areas. If you’re heading out for a longer run, check out the Cape Cod Rail Trail. It’s a paved bike trail, which is great for a smooth run without worrying about cars. It’s also very populated in the spring and summer months.

Alternatives To Running Alone

I get it. You run because it’s the one time of day you actually CAN be alone. The solitude is the biggest part of its charm. However, think of some alternatives here and there to minimize how often you’re running alone. Can you run later in the morning with your kiddo in a jogging stroller? Are you open to using a treadmill at the gym and taking advantage of their childcare? What about running with people? Marathon Sports has a running group every Thursday at 6:00pm. If that time doesn’t work for you, make your own! Hop on the Cape Cod Moms Facebook group and see if there’s anyone else in your area looking for a running buddy.

Always remember, you’ve got this, you’re doing great, and you have great kids with a great mom who cares about keeping herself safe.

Navigating Severe Food Allergies in Kids

doctor using a stethoscope to examine a child holding a teddy bear, navigating severe food allergies in kids

Parenting is full of curveballs. Just when you think you’re hitting your stride there is a new obstacle. One of my biggest challenges has been navigating our son’s severe food allergies. When he was just eighteen months old, I entered the world of scratch tests, EpiPens, and lengthy grocery store visits. I experienced intense anxiety over what to feed my child and how to keep him safe. Almost five years later, I’m sharing tips for anyone new to or struggling with navigating severe food allergies in kids.

Form a partnership with your child’s pediatrician

A strong relationship with your child’s primary care doctor is critical when there is an ongoing medical condition. You will rely heavily on them for advice, reassurance, and referrals to specialists. Speak up and ask for what you need. For our family it was important to have access to a team of pediatric allergists. Because of our older son’s allergies, it was also a high priority that our younger child have a scratch test prior to introducing common allergen foods. Your pediatrician can help you prepare for specialist visits, which can be stressful and emotional. After conversing with my pediatrician, I keep a running list of questions in a note on my phone so I can remember everything during our annual allergy visits.

Seek emotional support

It’s hard to put into words the intense anxiety that comes with seeing your child experience anaphylaxis. It can be challenging to find a balance between getting your child to internalize safety restrictions but also feel comfortable trying new foods and eating outside your home. We try to allow our son and ourselves to feel frustrated and grieve the allergy while also remaining positive. Our family recently started working with a psychologist who specializes in immunology. She has helped us manage both our son’s anxiety as well as our parental anxiety.

Create an allergy bag

Put all your allergy necessities in a central bag that is easy to transport and have with your child at all times. We use a mini backpack similar to this. In our bag we carry Zyrtec, Benadryl, 2 EpiPens in this case, wipes, a copy of our son’s insurance card, and doctors’ phone numbers. We also include allergy-friendly snacks and candy to have on hand.

Get organized

Being an allergy parent requires more preparation. When I was starting out, I kept a categorized list of allergy-safe foods for breakfast, lunch, dinner, dessert, and snacks. This helped me focus on the foods that were options and dwell less on the ones that were restricted. I also developed a working list of special-occasion recipes by holiday. This helps me plan ahead for the ingredients to keep on hand as I approach the different times of year.

Attending kids birthdays can be tricky from a food perspective. I usually reach out when I RSVP, letting the family know about my son’s allergy and seeing what’s on the menu. This way I can bring something similar without putting any stress on the host. We keep our freezer stocked with vegan cupcakes so that when celebrations come up we are dessert ready.

Utilize blogs and social media resources

I regularly use recipes from the blogs Allergy Awesomeness and Make it Dairy Free. I also belong to several Facebook groups: Parents of Children with Multiple Food Allergies, Moms of Kids with Milk Allergies, Allergy Moms Who Travel, and Disney Food Allergy Group. These groups are clutch when you need ideas for a recipe. Through these groups I also discovered the “switch witch.” For those of us who celebrate Halloween, the “switch witch” comes on Halloween night to take away any candy with allergens. In its place she leaves a small treat. These groups also help me find ideas for safe foods and restaurants when traveling. I direct message any restaurant I’m considering and ask them about their food preparation and how they avoid cross-contamination.

Stock up on allergy-safe foods

You will be packing a lot of your own food so it is helpful to have things on hand. We have great luck finding a range of dairy- and egg-free food at Trader Joe’s. Their vegan desserts such as these mini cones, bon bons, and sunbutter cups are favorites in our house. We also love their vegan pesto, french onion dip, parmesan, mozzarella, and Boursin cheeses. Some of our other go to brands include: So Delicious, Kite Hill, Yum Earth Candy, No Whey! Foods, Partake, Made Good, Enjoy Life, Hippeas, Abe’s Muffins, Daiya, and Applegate Farms. If food insecurity is impacting your access to allergy-safe foods, these resources may be helpful.

While allergy life can be complicated, you will find your new norm. Your child can still enjoy eating delicious food. It just takes work, patience, and creativity. You’ve got this!

Cape Cod Moms Guide to the Solar Eclipse

Family wearing solar eclipse glasses outdoors, solar eclipse cape cod

Get ready, Cape Cod! On April 8, 2024, the “Great North American Eclipse” will grace our skies. But what exactly is a solar eclipse, and how can you safely enjoy this cosmic event?

In this guide, we’ll answer these questions and more, ensuring you’re fully equipped to witness this awe-inspiring phenomenon right here in our own backyard.

What is a solar eclipse?

A solar eclipse happens when the moon passes between the Earth and the sun, casting its shadow on our planet. While they occur several times a year, they’re not always visible from the United States. The last one visible here was on August 21, 2017. Totality, the moment when the sun is completely hidden by the moon, leads to a darkened sky and temperature changes. Remember to never look directly at the sun during an eclipse without proper eye protection.

What’s visible here?

According to NASA, on April 8, 2024, Cape Cod will experience the solar eclipse with about 89% totality. It is expected to begin around 2:00 PM, peak at approximately 3:20 PM, and end by 4:30 PM.

How can I safely view the eclipse?

You should never look directly at the sun, even during a solar eclipse. This is because doing so can cause retinal burns and permanent damage to the retina. Sunglasses are not safe to use. To view the event safely, you’ll need eclipse-safe glasses that meet the ISO 12312-2 international standard. If you don’t have access to eclipse glasses or if you prefer a DIY approach, consider making a homemade pinhole projector.

Here are stores where you can purchase eclipse glasses (while supplies last):

  1. Titcombs Bookshop, East Falmouth
  2. Staples
  3. Lowes
  4. Walmart
  5. 7-Eleven

Where can I watch it?

You can view the eclipse from anywhere outside! Several locations on Cape Cod are hosting solar eclipse viewing parties. Check event listings for details and the availability of eclipse glasses.

  1. South Yarmouth Library
  2. Maria Mitchell Association, NHS Old Baseball Field, Nantucket
  3. Sea Crest Beach Hotel, North Falmouth
  4. Falmouth Public Library
  5. Chatham Bars Inn
  6. Martha’s Vineyard Museum

As the Great North American Eclipse approaches, we’re excited to share tips for a safe and memorable viewing experience. Remember, protect your eyes, and cherish this extraordinary event. We hope you enjoy every second!

View the Solar Eclipse Safely: DIY Pinhole Projector Guide

illustration of pinhole projector with instructions, solar eclipse pinhole projector

Excited to watch the solar eclipse but struggling to find eclipse-safe glasses that meet the ISO standard? Don’t worry, we’ve got you covered! In this guide, we’ll show you how to craft a simple yet effective solar eclipse pinhole projector using common household materials, ensuring a safe viewing experience. Remember, never look directly at the sun during a solar eclipse without proper eye protection! Doing so can cause irreversible damage to the eyes.

This DIY pinhole projector is adapted from NASA.

Materials

  1. A cereal box
  2. Aluminum foil
  3. Paper
  4. Pencil
  5. Scissors
  6. Tape
  7. Optional: Pin or paperclip

Step 1: Prepare the Box

Position the cereal box on the paper. Using a pencil, carefully trace around the bottom edge of the box to create an outline. Next, use scissors to cut along the tracing. Tape the paper cutout securely to the inside of the cereal box’s bottom, ensuring it covers the entire surface. Finally, seal the top of the cereal box with tape to prevent any light from entering.

Step 2: Create Viewing Holes

On the sealed top of the box, use scissors to cut two rectangular holes—one on each side. These rectangles should extend halfway towards the center of the box, leaving only the central portion intact.

Step 3: Construct the Pinhole

Cover one of the holes with aluminum foil and secure it in place with tape. Then, use a pencil, pin, or paperclip to make a small hole in the center of the foil.

Step 4: Viewing the Eclipse

During the eclipse, stand with the sun behind you and look through the right uncovered hole. You’ll see the projected image of the eclipsed sun on the paper inside the box’s bottom!

As the solar eclipse approaches, we hope this guide for making your own pinhole projector has given you the knowledge and tools you need to safely view this event. For more information on the solar eclipse, including what an eclipse is and where you can view it, be sure to check out our comprehensive guide, Cape Cod Moms Guide to the Solar Eclipse.

Remember, whether you’re using eclipse-safe glasses or a DIY solar eclipse pinhole projector, never look directly at the sun without proper eye protection. Happy (and safe!) eclipse viewing!

I Called My Mom

This guest post was written and submitted by Kerry Johnson. We are grateful for her contribution!
wooden hearts hanging up, motherhood this way

You’ve heard it or perhaps said it yourself many times before: children don’t come with an instruction manual. Twenty-four years ago when my oldest child was born, that felt even more true to me than it does today. There were no helpful Instagram accounts to follow, no Facebook groups to join, no TikTok hacks to try, and no parenting podcasts to listen to. The other new moms I knew were few and far between, and the nannies in my friend group were not yet moms themselves. Certainly, there were books and magazines, and I read them all. But nothing prepared me emotionally for becoming a mom, and it knocked the wind right out of me. I did the only thing that had ever helped anything: I called my mom.

When my first child was born, I felt confident that I could handle it. All of it. I was a nanny, a professional child caregiver! I had certifications, a college degree, and the reference letters to prove it. But when I found myself sobbing in the rocking chair of my cozy farmhouse kitchen, unable to soothe an inconsolable newborn, scream-crying, “I AM A SKILLED PROFESSIONAL AND I CAN. NOT. HANDLE. THIS,” I knew I was in over my head. The gut-crushing, breathtaking love for my child was there, and the technical skills were certainly there. My ability to figure out what to do next was not. So I called my mom.

Mothering came naturally to my mom. A champion and head cheerleader for those she loved and believed in, she was a caring nurturer by nature. She listened tirelessly, with patience and empathy for whatever I needed or wanted to talk to her about. Never judgmental, always compassionate, regardless of what my sister and I presented her with. Our relationship was never fraught with any of the challenges so many of my friends faced with their mothers. Often, she was a mother to those friends as well, saying exactly what we all needed to hear: “I’m here. We’ll figure this out.”

By talking with my mom, hearing her stories and experiences, and knowing she was there, it became possible to navigate the torrential emotional and physical hurricane that is motherhood. She never questioned or contradicted my parenting choices, although I’m certain she didn’t always agree with them. (“Soy milk? Okay, honey, what brand should I get to have in the house?” “Co-sleeping? Why not? As long as you’re all getting some sleep!”) She was solidly there, supporting me and cheering me on, as she had been my whole life.

My mom always said she was born to be a mother until she became a grandmother. The moment she laid eyes on Katherine just hours after her birth, she fell truly, madly, deeply in love. She absolutely felt that being a grandma was her sole purpose, and truth be told, it kind of was. Ask anyone who knew her even just a little bit. Her granddaughters were her everything, and the feeling was mutual. The lovefest between “Bip” (as we called her) and my girls was a force of nature. She was with them constantly, always fully dialed in. Even though she was in excruciating pain from multiple chronic debilitating diseases, she never missed a moment of their lives. She always showed up joyfully. She said the girls took her pain away. I witnessed with absolute certainty that it was so.

I can no longer call my mom. Losing Bip two years ago was the single most painful loss of our lives. There is a gaping hole in our hearts and in our family that will never be filled. Not a single day passes when I don’t think of her multiple times—something she said, something she used to do, something I want to share with her. But mostly this: as I’ve navigated motherhood for the last 24 years, it’s true that I have had no instruction manual. But I have had a map. A beautifully detailed, painstakingly crafted map, created by friends and teachers, by other moms I’ve met along the journey, some of whom I’ve admired and others who I’ve tried not to be, but mostly, by MY mom, who charted the way, stood behind me in case I fell, and now lights my path from above.

For my spectacular mother, Sharri “Bippy” Brown
June 20, 1944 – October 27, 2021

Make Your Own Jellyfish

kids crafting jellyfish

Do your kids have a fascination with jellyfish? My kindergartener is obsessed with them,  especially the bright, colorful ones that have long tentacles. She loves catching the clear baby jellyfish at the beginning of the season that have no tentacles (or “moonies,” as we call them). And, come late July into August, she is constantly on the hunt with a net and bucket to catch the big, stinging jellyfish. Once she catches one and puts it in a bucket (with a little help!), she can literally watch it for hours. We’re constantly reminding her to be careful touching the top of the jellyfish! So, naturally as we make our way toward the end of winter, I had to find a craft that reminded us that summer is coming! Here’s how to make your own jellyfish with this easy and adorable paper plate craft.

What you need:

jellyfish craft supplies

  • Paper plates
  • Scissors
  • Paint, markers, crayons, or colored pencils
  • Hole punch
  • String or yarn

Jellyfish assembly:

two girls decorating paper plate jellyfish

Paper plate jellyfish are a fun craft for a wide range of ages, and the best part is they are EASY! My 2-year-old and 5-year-old were both excited to take part and could help with each step.

First, I recommend doing a bit of adult prep before sitting down with the kids. This prep includes cutting off the edge of the plate in a wavy pattern to make sure the outline looks  a bit more like a jellyfish. I prepped two plates each for my two girls. Next, I would recommend pre-cutting your yarn or string so that it is ready to go when the time comes to tie on the tentacles. I used different color yarn because I know my kids like to alternate colors and designs. 

Now comes the fun! My girls decided to use crayons and markers to decorate their jellyfish. When adding extra creativity to your jellyfish, you can do as much or as little as you want.  You can add some fun flairs like glitter or gemstones. You could even add some googly eyes for extra fun. 

girl punching holes in bottom of paper plate

Once their jellyfish creation is complete, you are going to want to punch holes in the bottom of the plate along the wavy line to tie on the tentacles. Depending on the age of your kid(s) you might have to help out with the hole punching. My kindergartener is obsessed with hole punching and wanted this to be her job, but my 2-year-old is not quite ready to do this step on her own.

Next, you will want to tie the strings onto the plate, making the knots in the back so that they are not visible. Again, this could be a parent or a kid task depending on your child’s tying abilities.  Once the tentacles are on your jellyfish, voila, it is complete! Feel free to make as many as you want. 

The Finished Product:

paper plate jellyfish

My girls were both so proud of their jellyfish and couldn’t wait to show them off to friends and family. This is definitely a project we will be repeating again and I look forward to incorporating it into the next playdate we host.

Feel free to share your jellyfish by tagging me @snfenlon and @capecodmoms on Instagram.


4 Overlooked Barriers to Arousal

two pairs of feet with socks in bed, barriers to arousal
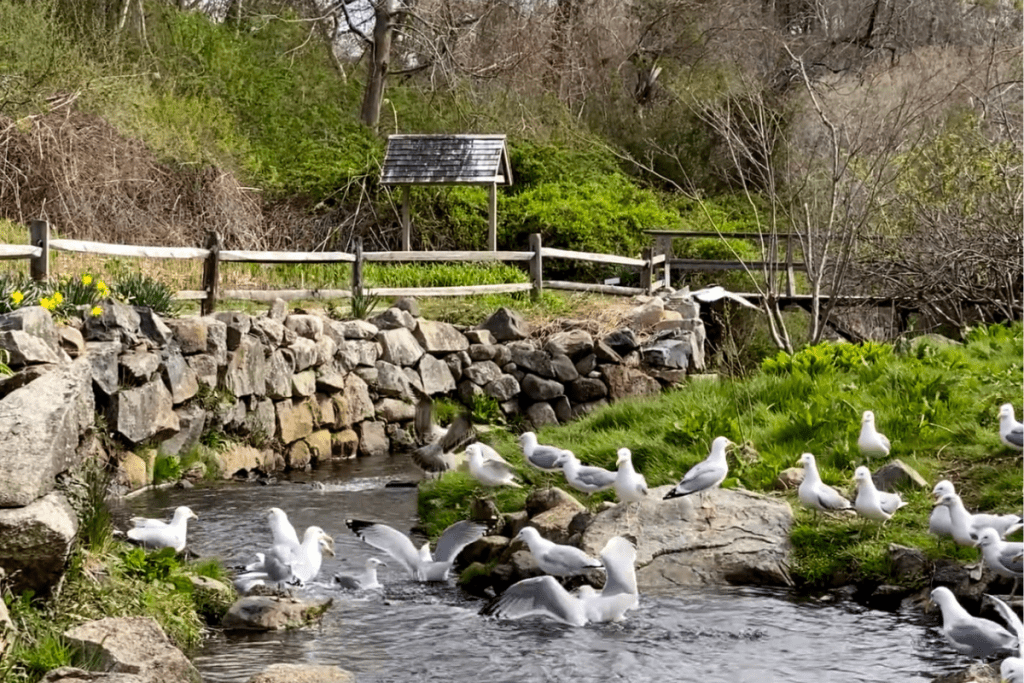
Moms, does it seem like arousal comes so easily to your partner, but not for you? Read on for easy fixes to four of the most overlooked barriers to female arousal.

1. “I’m freezing!” 

The ideal temperature range for great sex is between 69 and 72 degrees. Are you making love over or under the covers? Is it slow and quiet, or hot and steamy? “No-body” wants to be shivering and “no-body” wants to be sweating. When we are cold, our body wants to recoil and cover up, and when we are hot, we want to push away.

Easy Fixes

  • Turn up the thermostat one hour before heading to your room of passion. If you do not have a thermostat in your bedroom and don’t want to heat a larger area of your house, invest in a small space heater like this one. You can quickly heat your room and then turn it off. Some are going to balk at the energy cost. I get it, but don’t let the temperature in the room interfere.
  • Wear socks. They aren’t a huge fashion statement in the bedroom. But seriously, for the sake of comfort and your arousal process, you can learn to love them if they make a difference.

2. “What if our child comes in?” 

Men worry less than women about the risk of a walk-in. Women worry more and struggle to get their arousal process going or re-started if they are uneasy and can’t relax. (The “family bed” and “co-sleeping” are topics that are too big to address here, so please keep that in mind as you read on.)

Easy Fix

  • If your issue is one of worrying that a good sleeper or older child will innocently appear at your bedside in the middle of the night and you just need some peace of mind and an extra minute to make yourselves decent, consider a privacy lock like this one. It’s easy to change out a doorknob and it won’t break the bank. 

3. “I’m stuffed!”

You and your partner schedule a babysitter, choose a nice restaurant, and thoroughly enjoy your meal. The meal is typically indulgent, high fat, high calorie, or a larger portion than you usually eat. Feeling slow, sleepy, and bloated follows. Consumption of alcohol, and of course, drugs, can also impact how you feel. 

Easy Fix

  • Plan your date so that your lovemaking precedes the meal, or chose your meal more carefully.

4. “Your hands are too rough.” 

The body remembers. Many of our men work with their hands. Whether a mechanic, carpenter, or guitar player, people who work with their hands can develop calluses and rough hands. We love our hard-working men, but their rough skin will not work in bed. Eczema can also be an issue for both men and women. The body will be on guard for an uncomfortable sensation and you will not be able to fully relax.

Easy Fixes

  • Men, wear gloves that are appropriate for the work you do.
  • If you can’t keep your hands smooth, wear gloves in the marriage bed. Just like with socks, some people are going to have a hard time getting past the look of the gloves. If the “doctor” fantasy turns you on, this will work out well for you. If not, you just need to let it go. The benefits should outweigh the difficulty in getting past it, and a gloved massage with the right gloves and oil can be a great experience.
  • Here is an example of gloves that have worked for romance. With these gloves, make sure they fit properly, close to your skin, so they won’t slip around on your hands. Also, turn them inside out. There is a slight texture for grip on the outside of the fingers, but on the inside, they are silky and slippery even without oil, so wear them inside out.

If any of these barriers are present for you, share this article with your partner so that you can talk about it and solve it. If he wants you to be turned on and more engaged in your sex life, he will listen.

Guys, if you are reading this, listen! Even though these might not be barriers for you, take her seriously when she says they are barriers for her.

As mentioned in previous posts, like this and this, open communication is so important and will enhance your sex life and deepen your relationship. Stay tuned to Cape Cod Moms for more on these topics, and if you are struggling, please connect with Tracy Lamperti, LMHC, or another certified sex therapist.